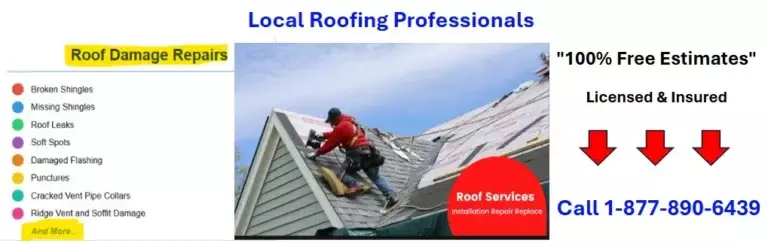
Roof Insurance Claim Process
Key Highlights
- Understanding your homeowners insurance policy is crucial for roof damage claims.
- Documenting damage thoroughly with photos, videos, and written estimates is essential for a smooth claims process.
- Working with a reputable roofing contractor can help you navigate the claims process effectively.
- Timely communication with your insurance company and a clear understanding of their procedures can expedite the claim settlement.
- Being aware of potential roof repair scams after severe weather events is important to protect yourself from fraudulent contractors.
Introduction
Dealing with roof damage can be really stressful. It is even more confusing when you have to work through the insurance process. This guide is here to help homeowners understand roof insurance claims better. It explains the steps you need to take, what types of damage are covered, and gives tips for making your claim easier and successful. You will learn about your homeowners insurance policy and how to find a good roofing contractor. With this information, you can feel more confident as you go through the roof repair process.

Understanding Roof Insurance Claims
Roof insurance claims are part of the dwelling coverage in your homeowners insurance policy. This coverage helps to protect your home’s physical structure, which includes the roof, from certain risks mentioned in the policy. Remember that insurance usually covers sudden and accidental damage.
This includes damage from events like hailstorms, windstorms, or falling trees. However, it does not cover damage from lack of maintenance, normal wear and tear, or issues that could have been prevented.
Different Types of Roof Damage Covered by Insurance
Homeowners insurance helps protect against different types of roof damage. This mainly covers damage from sudden events. These include hail, wind, fire, lightning, falling objects, and heavy ice or snow. For example, if a hailstorm harms your asphalt shingles, your insurance would likely pay for repairs or replacements.
If a tree branch falls on your roof during a windstorm, the insurance should pay for the damage too. However, it is important to know that insurance may not cover the full cost of a new roof if only part of it is damaged.
The age and condition of your roof matter for how much coverage you can get. An older roof with existing wear and tear may get a smaller payout than a newer roof with similar damage.
Common Reasons for Claim Denials
Homeowners insurance can protect you from many risks. However, there are times when your claim might be denied. This often happens because of misunderstandings or policy exclusions. A common reason for claim denials is damage from a lack of maintenance. Homeowners must take care of their property. Insurance companies expect that necessary repairs are made quickly.
If you ignore regular maintenance, small issues can turn into big problems, which might lead to claim denials. Another reason for denial can be damage from events not covered by a standard homeowners insurance policy.
For example, earthquakes, floods, and infestations are usually not included in basic coverage. It’s important to read your policy closely. You may need extra coverage options, like flood insurance or earthquake insurance, especially if you live in an area affected by these risks.
Knowing what is not covered and the limits of your policy can help you avoid surprises. This way, you can make sure you have the right protection.
Preparing for the Claim Process
Before you start the roof insurance claim process, it’s very important to collect essential documents and closely document the damage. This way, you can support your claim effectively. Being prepared can speed up the process. It can also help avoid delays, making sure you get a fair settlement.
When you take the time to organize and gather all necessary information, you show your insurance provider a well-documented case. This increases your chances of having a smooth and efficient claim experience.
Documents You Need to Get Started
Having the right documents ready is very important when you start an insurance claim for your roof. This process can be complicated. Your homeowners insurance policy is the key document. It shows what you are covered for, your deductibles, and any limits. Keep a copy where you can easily find it and know its terms.
You also need proof that you own your home, like a deed or mortgage statement. This helps the insurance company check if you are eligible for coverage. It’s good to keep records of any previous roof repairs or maintenance.
This shows you take care of your home and helps your claim. This is especially useful if the damage came from a situation that worsened an existing, well-maintained issue. Organize these documents by date to create a clear timeline of your roof’s history.
Taking this thorough approach can make your claim stronger by showing you are a careful homeowner.
How to Document Roof Damage Effectively
It’s important to have clear and complete documentation of your roof damage to help your insurance claim. First, take detailed photos and videos of the damaged areas. Get close-ups that show how bad the damage is. Also, take wider shots to show the overall state of the roof.
Make sure to take these photos in good lighting. Try shooting from different angles to give a complete view. You might also want to get a written estimate from a good roofing contractor.
This estimate should explain the damage, the suggested repairs, and the estimated costs. A professional evaluation can make your claim stronger.
Don’t forget to keep records of all conversations with your insurance company, like phone calls, emails, and letters. It can help to note down the date, time, and names of the people you speak to, just in case there are any issues during the claims process.
Get Your Own Professional Estimate…

Step-by-Step Guide to Filing a Roof Insurance Claim
Filing a roof insurance claim is not that hard. You can make it easier by following these simple steps. This will help you work well with your insurance company to get fair compensation. Staying organized and communicating clearly can make your claim process go more smoothly.
Step 1: Review Your Insurance Policy for Coverage Details
Before you file a claim, take the time to read your insurance policy carefully. This will help you know what coverage you have, the deductibles, and any limits for roof damage. Pay special attention to the covered perils. These are events that can cause damage and are included in your policy, like hail, windstorms, fire, and falling objects.
Also, know your policy’s coverage limits. These limits tell you the most money your insurance company will pay for a covered claim. Understanding these limits will help you have realistic expectations for your settlement.
Look for any exclusions or special conditions related to your roof, like age limits or specific materials needed. By knowing the details of your policy, you can avoid surprises and make sure your claim fits your coverage.
This smart approach helps you find any issues early and makes the process easier.
Step 2: Report the Damage to Your Insurance Company
Once you read your policy, report the damage to your insurance company right away. Most insurers have a claims hotline or an online portal to help with this. Be ready to share important details, like your policy number, when the damage happened, why it happened, and a short description of the damaged areas.
When you first report the claim, keep it clear and factual. Focus on the main facts of the incident. Your insurance company will help you with their claims process and give you any forms you need.
They will usually assign a claim adjuster to your case. This person will check the damage and see if you are eligible for coverage.
Step 3: Schedule an Appointment with an Insurance Adjuster
After you report your claim, your insurance company will send an adjuster to check the damage and review your claim. The insurance adjuster will look at the roof, note how much damage there is, and find out what caused it.
They will use their skills to write a detailed report. This report will list the needed repairs or replacements and provide estimated costs. When the adjuster visits, be ready to let them see your roof and share any important documents. These can include photos, videos, or estimates from contractors.
It’s important to be there during the inspection. This way, you can answer any questions the adjuster has and give them more details about what happened and the state of your roof before the damage.
Step 4: Obtain Repair Estimates from Licensed Roofing Contractors

While the insurance adjuster gives a damage assessment, it is a good idea to get separate repair estimates from licensed roofing contractors. Getting several estimates helps you compare costs, services, and timelines. This way, you can get a fair and competitive quote.
When picking a roofing contractor, focus on those who know how to work with insurance claims and have a proven record of good work. Ask for a detailed written estimate that shows the work scope, materials, labor costs, and any permits or fees needed.
A clear estimate saves you from surprise costs and keeps things clear during the repair. After getting multiple estimates, review them carefully. Make sure the details match the adjuster’s assessment and are in a reasonable range.
Step 5: Submit Your Claim and Follow Up
After you have all the required papers, like the adjuster’s report, your contractor’s estimate, and any other proof, send your claim to your insurance company. You can do this online or by mail, depending on what they prefer. Remember to keep copies of everything for yourself.
After you send in your claim, give your insurance provider some time to review it carefully. Stay in touch with them to check the status of your claim and to ask any questions you have.
Checking in regularly shows that you are proactive and helps get a quick answer. If you face any problems during the claims process, contact your insurance agent or the claims department for help.
After the Claim: What Happens Next?
Knowing what happens after you file a roof insurance claim can help reduce stress and get you ready for what comes next. It’s important to talk openly with your insurance company. You should also understand the timeline of the process. Lastly, have a plan for how to use the claim funds effectively. These steps are key to a smooth process.
Understanding the Insurance Company’s Assessment
After the insurance company looks at your claim and the adjuster’s report, they will make a decision about your coverage. They will send you a written explanation. This will include the repairs or replacements they approved, the covered costs, and any deductibles you need to pay.
You need to review this carefully to check that it is right and matches what is in your contractor’s estimate. If you agree with it, the insurance company will usually pay the covered costs. They might send the payment directly to you or your chosen contractor.
If you disagree with their assessment or think the coverage is not enough, you can appeal their decision. The appeals process can be different from one insurance company to another. Generally, it means you will need to provide extra documents or expert advice to support your claim.
Receiving and Using Your Claim Funds
Once you agree with the insurance company’s decision and finish all the paperwork, you will get your claim money. The way you will be paid depends on the insurance company and the terms of your policy.
Some companies send checks straight to you, while others pay the roofing contractor directly. If the money comes to you, make sure to use it quickly for the repairs or replacement you need.
Waiting too long to make repairs can worsen the damage and may affect your insurance coverage. Before you start any work, ask your roofing contractor about the payment plan and any upfront costs you might need to pay. Be clear on how the deductible is managed.
In some situations, you may need to pay the deductible to the contractor yourself, but other times, it will be taken out of the insurance payment. Always get a clear receipt from your contractor when the work is done.

Conclusion
Navigating the roof insurance claim process can be tricky. However, if you have the right knowledge and preparation, it can become easier. First, know the types of roof damage that your insurance covers. Also, learn about common reasons why claims can be denied and what documents you need. Follow a step-by-step guide carefully, starting with reviewing your policy to submitting your claim. After you submit the claim, understand the next steps, like how the insurance company will assess it and how to use any funds received. Stay informed and active to have a good experience with your roof insurance claim. If you need detailed help or advice during this process, don’t hesitate to ask for expert guidance.
Frequently Asked Questions
What is the average time frame for a roof insurance claim?
The time it takes to settle a roof damage claim can differ. It depends on the insurance company, how complicated the claim is, and other factors like the weather and how many claims are being handled in your area. Usually, the insurance process, from filing the claim to getting a settlement, can take a few weeks to a couple of months.
Can I dispute a denied roof insurance claim?
Yes, you can challenge a roof insurance claim that was denied. Start by reaching out to your insurance agent or the claims department to talk about why it was denied. If you think the denial is not fair, you can make a formal appeal. If you run into problems, think about contacting your state’s department of insurance or the Better Business Bureau for help.
What is the process for filing a roof insurance claim?
Filing a roof insurance claim involves documenting the damage, contacting your insurance company, scheduling an inspection, meeting with the adjuster, receiving the claim decision, and getting repairs done. It’s crucial to have all necessary documents and evidence ready to support your claim effectively.